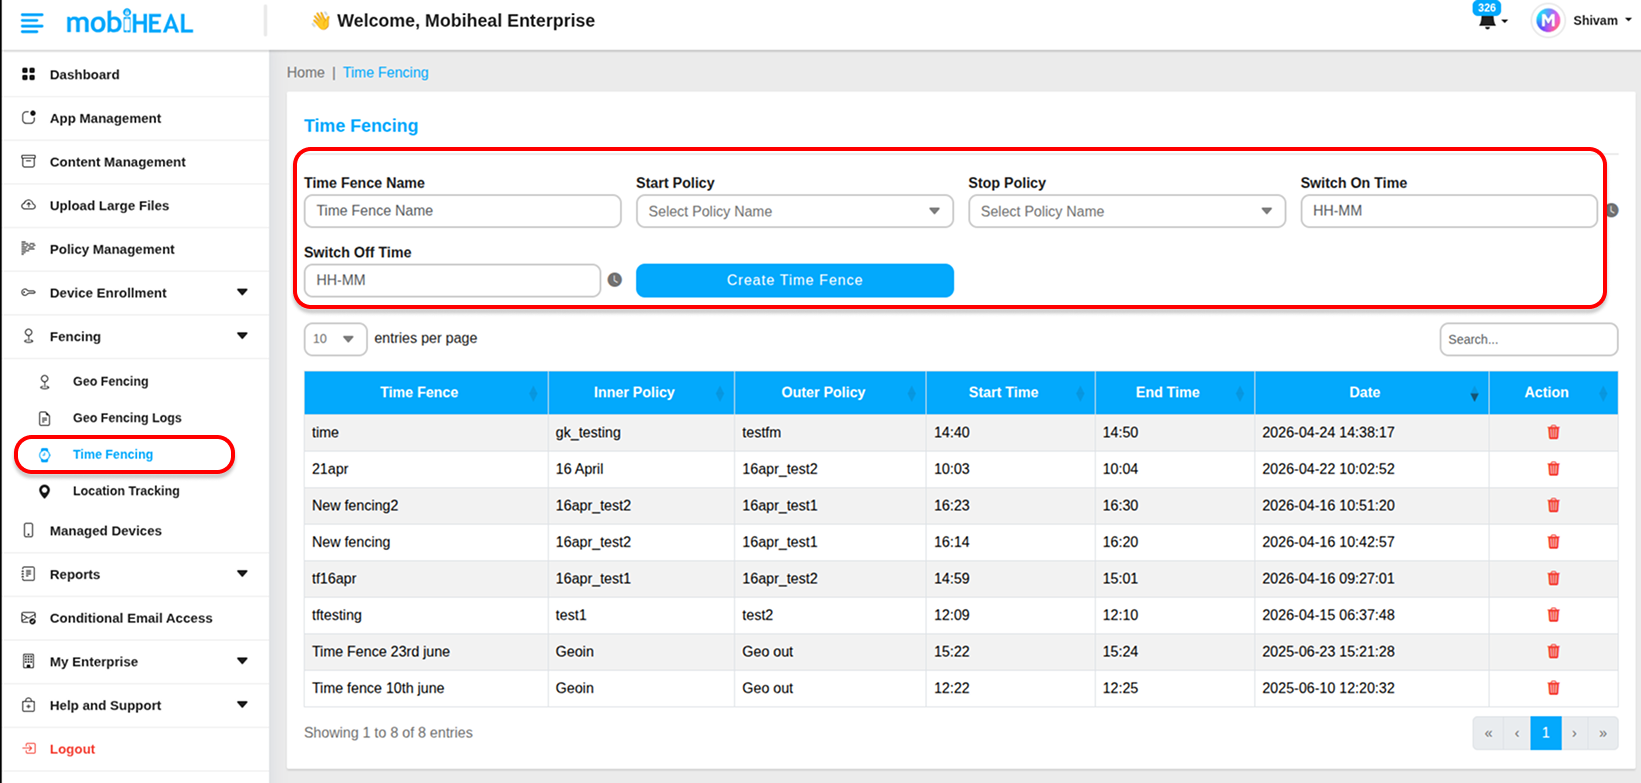
Time Fencing
Time Fencing automates Android device policy changes based on the time of day. Instead of relying on employees or IT staff to manually enforce work-hours restrictions, you define a schedule once and MobiHeal handles the rest — switching to a work policy when a shift starts and reverting to a restricted policy the moment the shift ends. This runs automatically every day without any ongoing IT involvement.
Common Use Cases
- Automatically unlock productivity apps at the start of a shift and block them at the end of the working day.
- Enforce a device lockdown policy outside of business hours to prevent unauthorized use of corporate Android devices.
- Apply different policies for different shifts — morning, afternoon, and night teams can each have their own dedicated schedule.
- Restrict internet access and social apps after working hours on corporate-owned Android devices.
Creating a Time Fence
Step 1 — Navigate to Time Fencing
Go to Time Fencing in the left sidebar. This opens the time fencing management screen where you can view existing schedules in the table and create new ones.
Step 2 — Define Your Configuration
- Time Fence Name — Enter a unique name that clearly identifies the schedule — for example, Shift_A_Morning or Business_Hours_HQ. This name will appear in the management table and in device activity records.
- Start Policy — Select the Android policy that will be applied when the Switch On time is reached. This is typically your active work policy — allowing the apps, connectivity, and permissions employees need during their shift.
- Stop Policy — Select the Android policy that will be applied when the Switch Off time is reached. This is typically a more restrictive policy — blocking non-essential apps, disabling internet access, or locking the device down to a minimal state after hours.
Step 3 — Set Your Schedule
- Switch On Time — Click the clock picker and select the time the Start Policy should activate — for example, 09:00 for a standard morning shift start.
- Switch Off Time — Click the clock picker and select the time the Stop Policy should activate — for example, 18:00 to mark the end of the work day.
Step 4 — Activate the Time Fence
Click Create Time Fence to save and activate the schedule. The time fence will appear in the management table and will immediately begin enforcing policy switches automatically at the configured times every day going forward.
Best Practices
- Create separate time fences for each shift rather than trying to cover multiple schedules with a single rule — this keeps configurations clean and easy to manage.
- Always assign a meaningful Stop Policy — never leave after-hours Android devices on the same permissive policy as work hours.
- Test the time fence by temporarily setting the Switch On time a few minutes in the future and confirming the policy switches correctly on a target Android device before rolling out to the fleet.
- Combine Time Fencing with Geofencing for maximum security — location-based AND time-based Android policy enforcement running simultaneously gives you the most complete automated coverage.
For location-based policy automation on Android devices → android-geofencing