Geofencing & Geofence Logs
Geofencing lets you draw a virtual boundary around any physical location — your office, a warehouse, a client site, or a restricted area. When a managed Android device crosses that boundary, MobiHeal automatically switches its security policy. No user action, no IT intervention — it happens instantly and silently in the background. Every boundary crossing event is automatically recorded in the Geofence Logs for complete audit visibility.
How Geofencing Works
- You define an Inner Policy — the Android policy applied when the device is inside the geographic boundary.
- You define an Outer Policy — the Android policy applied when the device moves outside the boundary.
- MobiHeal monitors Android device location continuously and switches policies the moment a boundary is crossed.
- Every policy switch triggered by a geofence crossing is automatically recorded in the Geofence Logs for audit and compliance purposes.
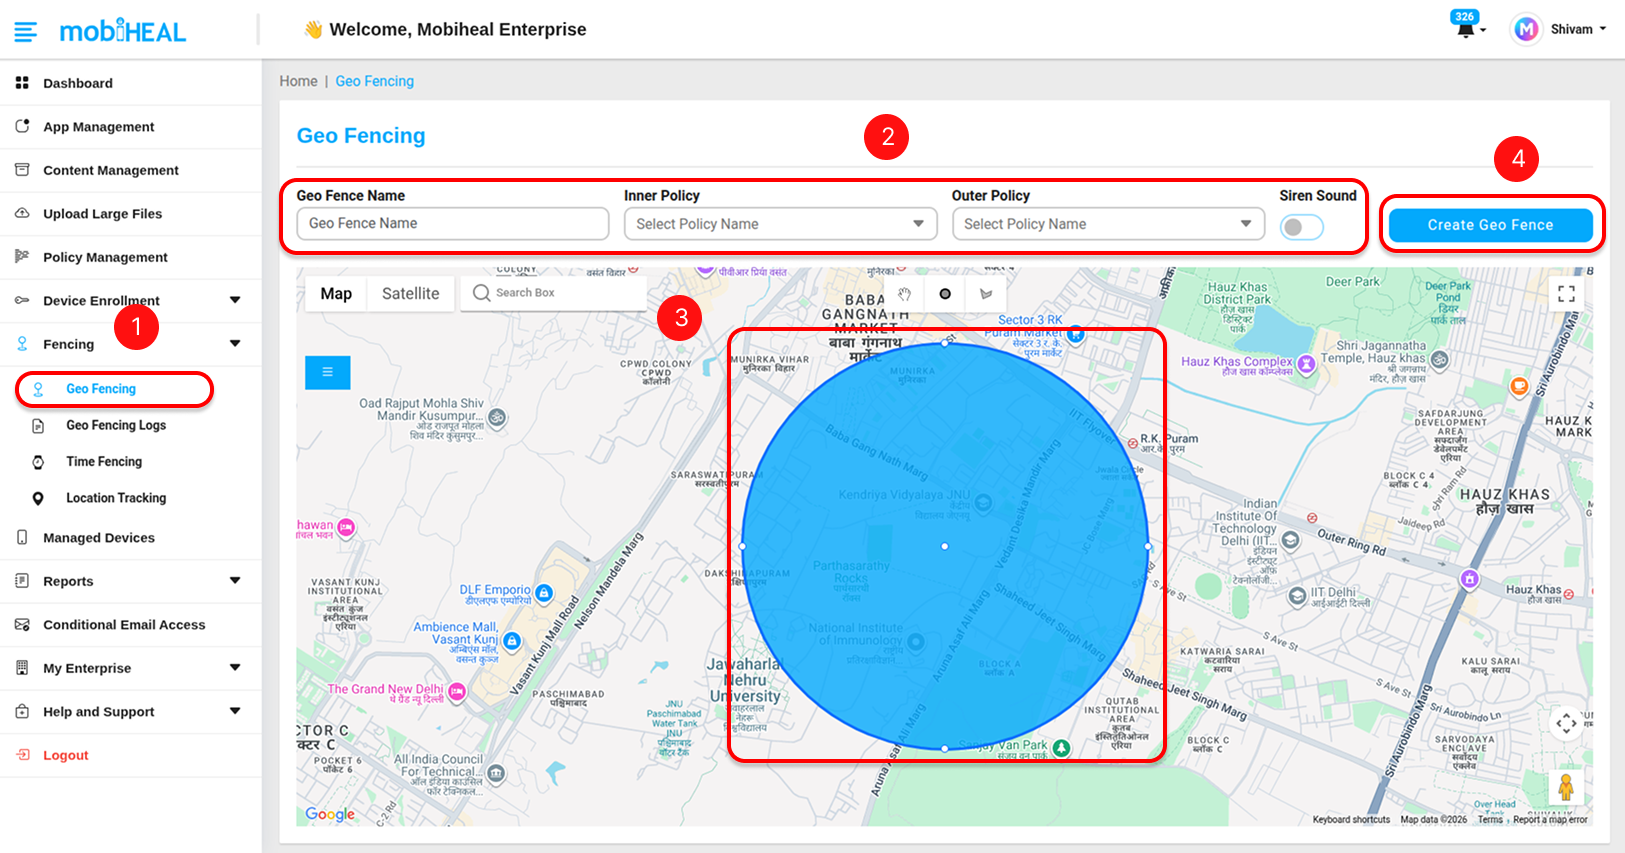
Creating a Geofence
Step 1 — Navigate to Geofencing
Go to Geofencing in the left sidebar. This opens the geofencing management screen where you can see your existing fences in the table below the map and create new ones.
Step 2 — Define Your Configuration
Fill in the geofence configuration fields:
- Geo Fence Name — Enter a clear descriptive name for the fence — for example, Headquarters_Perimeter or Warehouse_Zone_A. Use underscores instead of spaces for consistency across your fence list.
- Inner Policy — Select the Android policy to apply when a device is inside the boundary. This is typically a more permissive policy — for example, one that allows camera access, local Wi-Fi, and internal app usage.
- Outer Policy — Select the Android policy to apply when a device exits the boundary. This is typically a stricter policy — for example, one that blocks the camera, disables data transfer, and enforces VPN-only connectivity.
- Siren Sound (Anti-Theft) — Enable this toggle to activate the anti-theft feature. When turned on, a loud siren sound will automatically trigger on the device whenever it moves outside the defined geofence boundary, helping in quickly identifying and recovering the device.
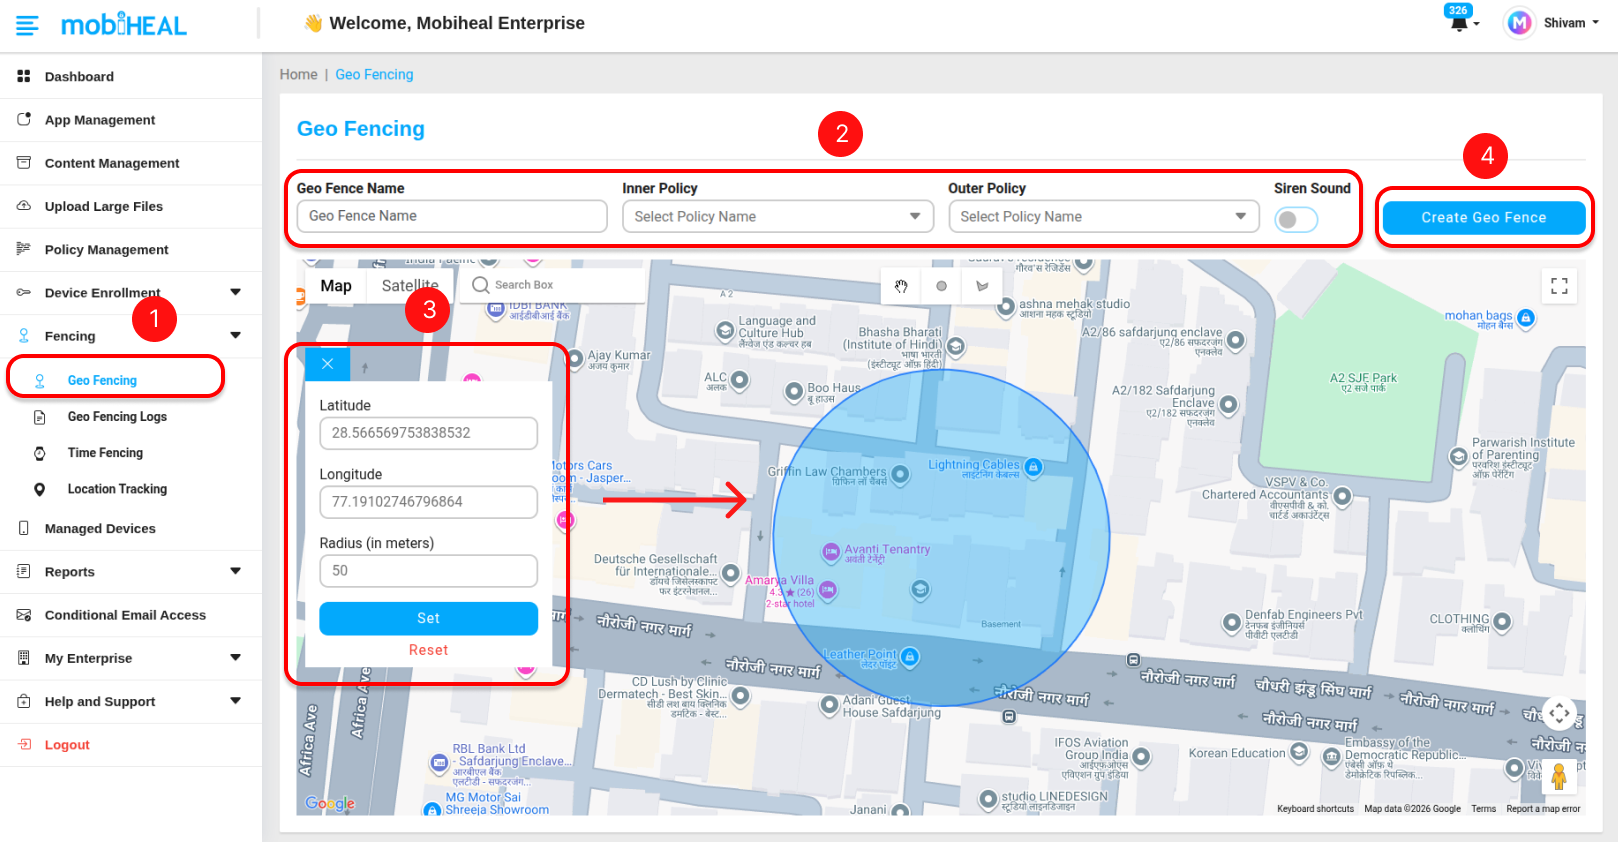
Step 3 — Set the Location and Boundary
Define the location and boundary of your geofence. You can configure the boundary using either the map or manual coordinates, depending on your requirement.
Using the Map
Draw the geofence boundary directly on the map by selecting the desired shape (such as a circle or other supported shapes). This method is ideal when you want to visually define the area by marking the exact region on the map.
Manual Coordinates — Enter the exact location details manually for precise placement:
- Latitude — Enter the latitude value (for example: 28.61296141)
- Longitude — Enter the longitude value (for example: 77.22931060)
- Radius (in meters) — Define the size of the boundary in meters. This determines how large the geofence area will be around the specified coordinates.
Step 4 — Create the Geofence
Click Create Geo Fence to save the boundary. The geofence will appear in the management table below the map — showing its name, assigned Inner and Outer policies, and current status. The fence will immediately begin monitoring Android devices assigned to the relevant policies.
Geofence Logs
Every time a managed Android device crosses a geofence boundary and a policy switch occurs, MobiHeal automatically records the event in the Geofence Logs. This gives you a complete, timestamped audit trail of all location-based policy enforcement activity across your fleet.
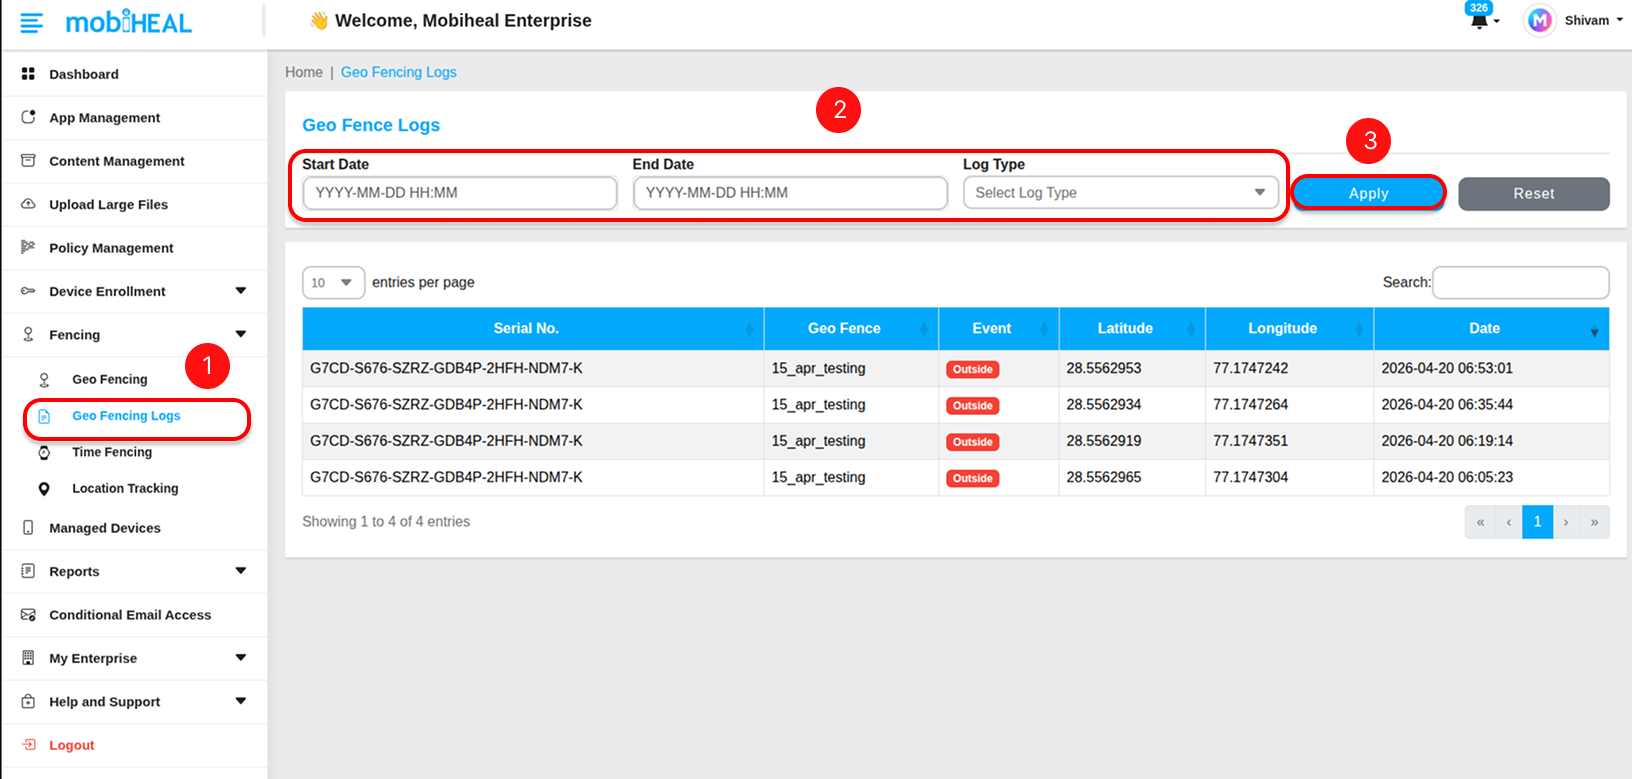
What the Log Records
Each entry in the Geofence Logs table contains the following information:
- Serial No. — The serial number of the Android device that triggered the geofence event, identifying exactly which device crossed the boundary.
- Geo Fence — The name of the geofence boundary that was crossed — matching the name you assigned when creating the fence.
- Event — The type of boundary crossing that occurred. Inside means the device entered the geofence zone and the Inner Policy was applied. Outside means the device exited the zone and the Outer Policy was applied.
- Latitude — The GPS latitude coordinate of the device at the exact moment the boundary crossing was detected.
- Longitude — The GPS longitude coordinate of the device at the exact moment the boundary crossing was detected.
- Date — The full date and timestamp of when the geofence event occurred, giving you a precise audit record.
Filtering Geofence Logs
Use the filter panel at the top of the Geofence Logs screen to narrow down the log entries and find exactly the events you need. The following filters are available:
- Start Date — Enter the beginning of the time period you want to review in YYYY-MM-DD HH:MM format. Only events on or after this date and time will appear in the results.
- End Date — Enter the end of the time period in YYYY-MM-DD HH:MM format. Only events on or before this date and time will appear in the results.
- Log Type — Filter events by crossing direction. Select Inside to see only events where Android devices entered a geofence zone. Select Outside to see only events where devices exited a zone. Leave unfiltered to see all events.
Best Practices
- Always test your geofence with a single Android device before rolling it out to the full fleet — confirm the Inner and Outer policies switch correctly when the device crosses the boundary.
- Set your radius large enough to account for GPS drift — a minimum of 100 to 200 meters is recommended for most locations.
- Use descriptive policy names like Allow_Camera_Office and Block_Camera_Field so the Inner and Outer policies are immediately identifiable in the geofence configuration and logs.
- Review Geofence Logs weekly to confirm boundaries are triggering correctly and no unexpected policy switches are occurring.